
FREE PATTERN | Crochet Swinging Frog
Weeeee! How cute is this little swinging frog? We are so in love with this whimsical and super easy pattern. We designed this FREE beginner crochet pattern as a rearview mirror decoration to transform your car into a cozy, joy-filled crochet wonderland (but you can really hang it anywhere you like!).
There are so many colour options and you can customize the length of the swing to fit any space. It seems like everywhere we look, people have something so cute and crocheted hanging on their rearview mirror.
There’s just something magical about crafting something handmade that brings warmth and personality to everyday life, including that (sometimes daunting) commute.

So, if you’re looking for a quick crochet market project (these look amazing on the craft table!), or something to gift to someone (or yourself!) then this is quick amigurumi pattern for you.
Let’s gather our supplies and dive in.
SUPPLIES:
Colour A: Size 4 Chenille yarn in green (3yds/12g)
Colour B: Size 4 Chenille yarn in white (3yds/12g)
I used Hobbii Toucan Fine in White (01)
Colour C: Size 4 Chenille yarn in pink (3 yds/12g)
Colour D: Size 1 or 2 Fine Cotton yarn in Black
6mm safety eyes
I used these ones from Hobbii
US E-4 (3.5mm) crochet hook
Stitch marker, or scrap piece of yarn
Fibre fill
Darning needle
Scissors

NOTES:
I sized down the crochet hook from the US K-10.5 (6.5mm) hook recommended on the yarn.
Different tension may create different results, this pattern is created with a tighter tension.
This project should be worked in a continuous spiral. Use a stitch marker to mark the beginning and end of each row.
You can use any weight of yarn for this pattern, just be sure to adjust to the appropriate hook size and remember the size of your finished product will be different.
ABBREVIATIONS:
mr: magic ring
sc: single crochet
slst: slip stitch
inc: increase (2 stitches in one stitch)
dec: decrease (crochet 2 stitches together)
[sc_, inc] x _ : Repeat the pattern in parentheses the number of times specified, increasing the stitch count.
[sc_, dec] x _ : Repeat the pattern in parentheses the number of times specified, decreasing the stitch count.
This work is copyrighted. Please do not alter this pattern in any way. You may not use any photos or written content in this pattern as your own. You may sell your work created using this pattern, but you must credit Double Dutch Crochet Co. as the original designer, including a link back to our original work. Copyright 2025.
PATTERN
Body
Colour A Yarn
Rnd 1: mr, sc 8 (8)
Rnd 2: (inc) x8 (16)
Rnd 3: [sc, inc] x8 (24)
Rnd 4: sc 24 (24)
Rnd 5: [sc 3, inc] x6 (30)
Rnds 6-10: sc 30 (30) (5 Rounds)
Rnd 11: [sc 3, dec] x6 (24)
Rnd 12: sc 24 (24)
Start Stuffing

Round 12 and body stuffing complete.
Rnd 13: [sc 2, dec] x6 (18)
Rnd 14: sc 18 (18)
Rnd 15: [sc, dec] x6 (12)
Rnd 16: [dec] x6 (6)
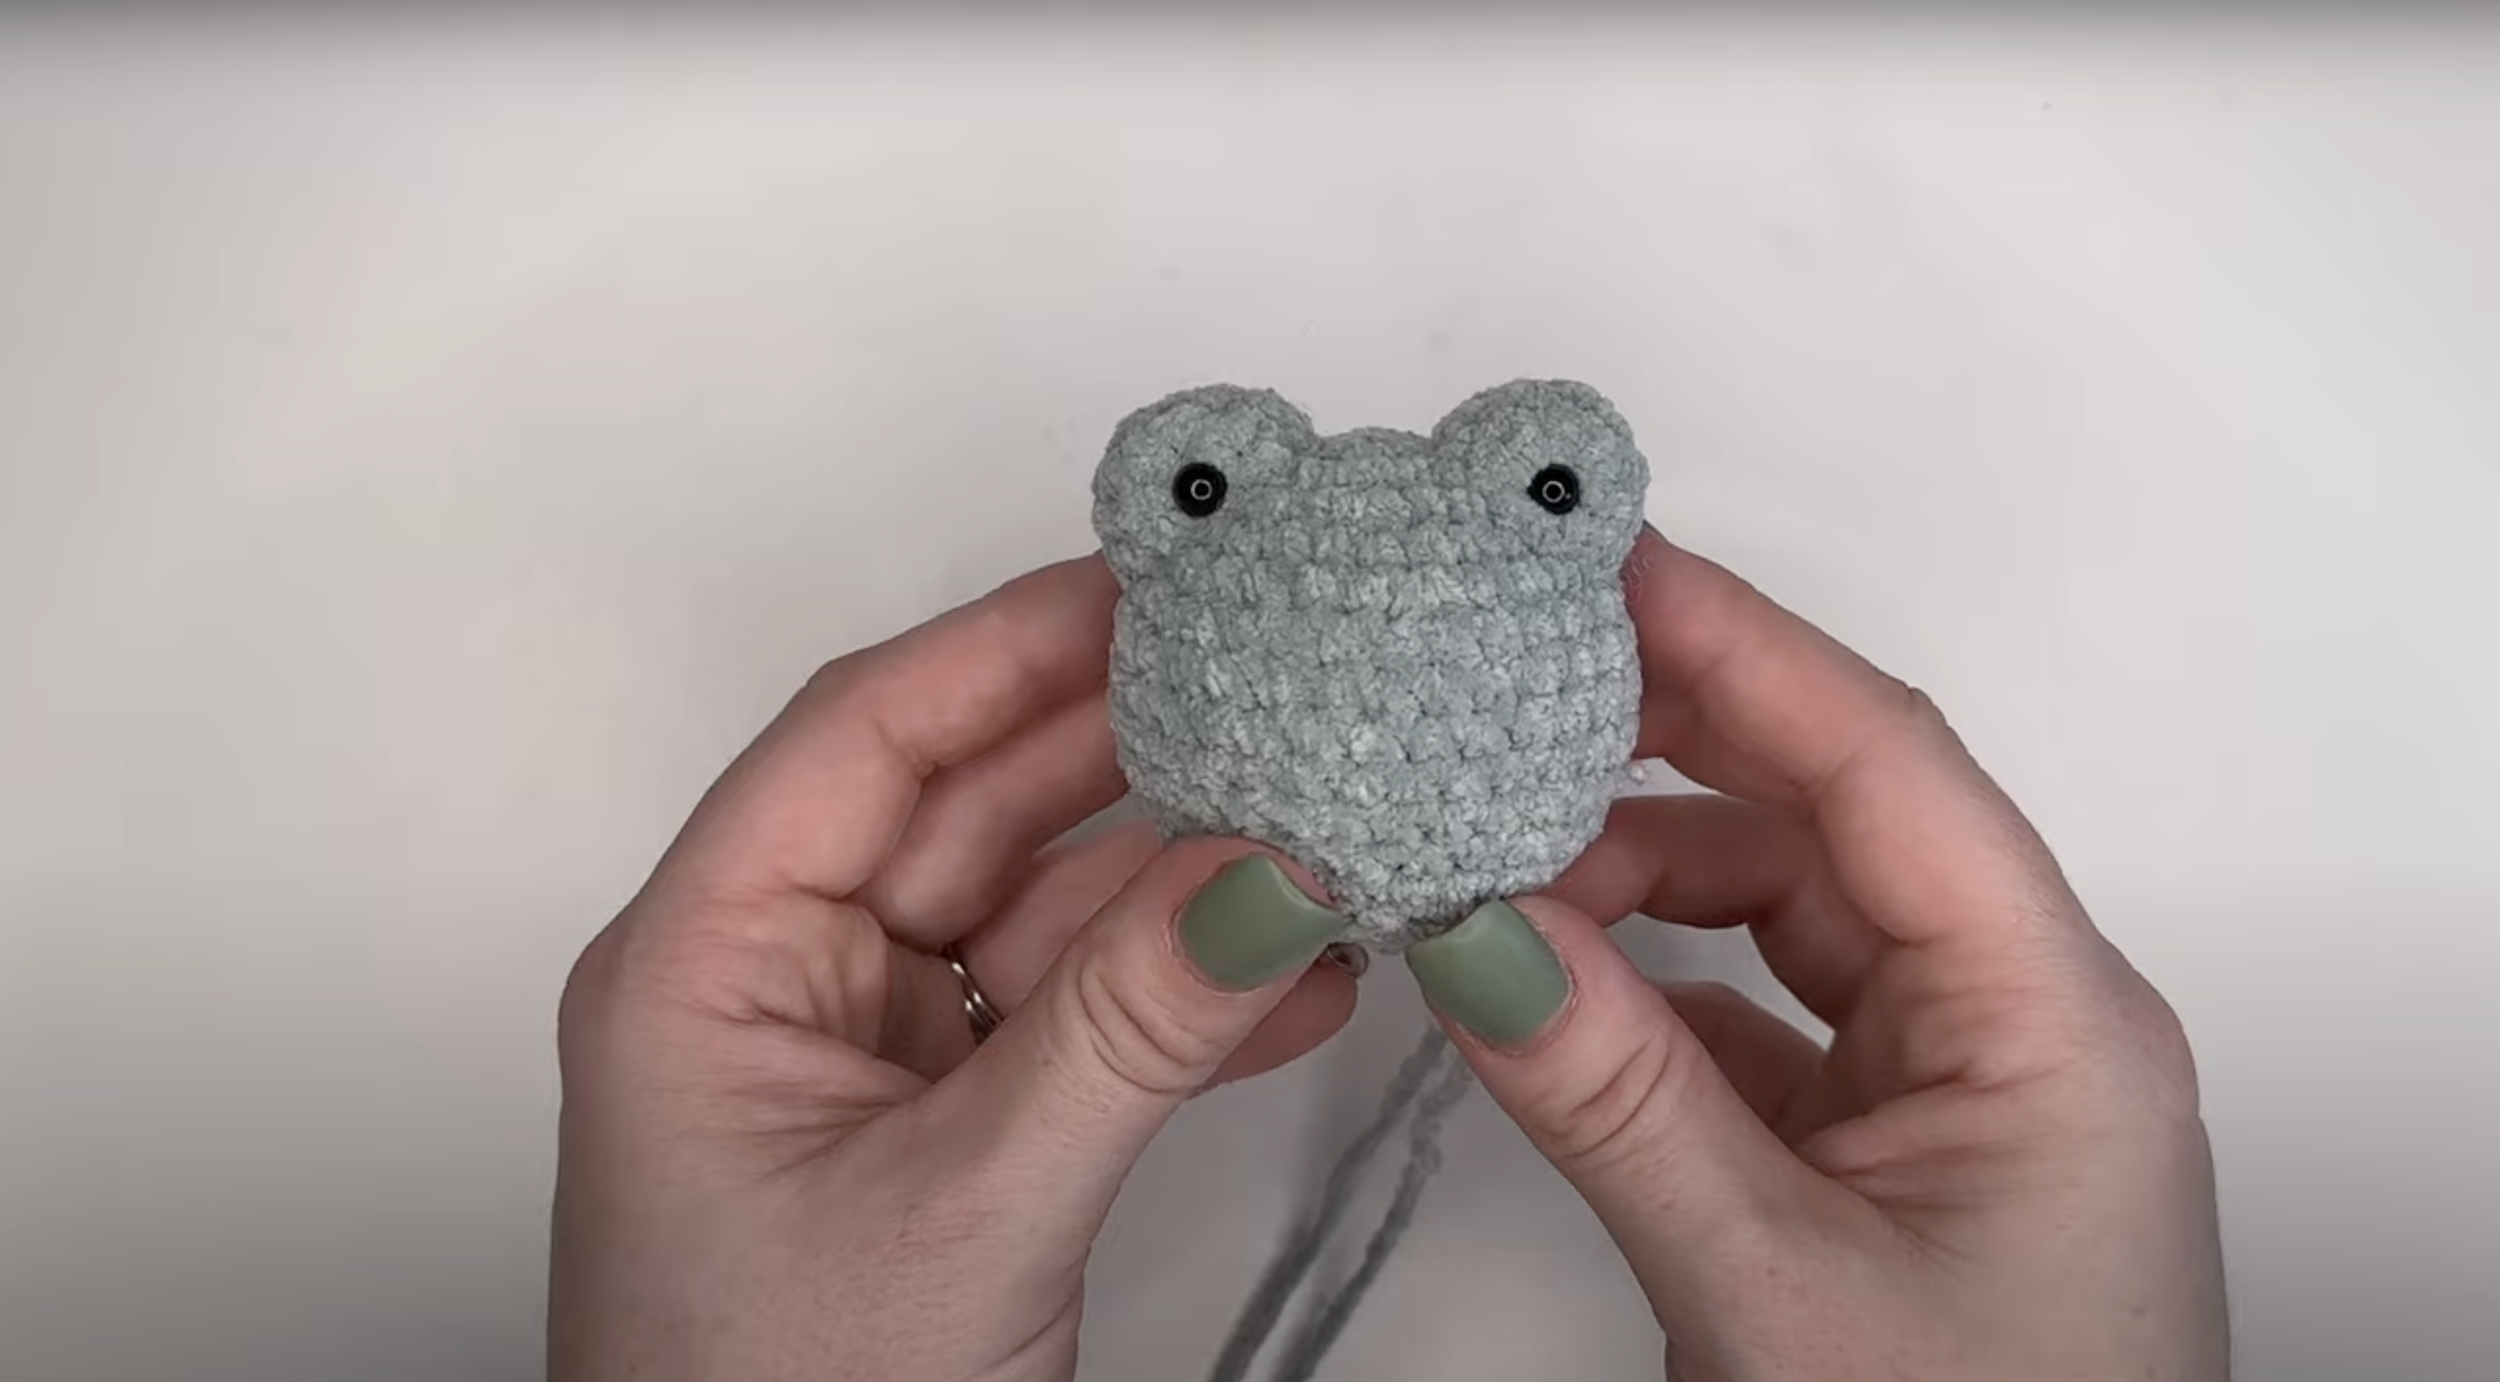
Eyes x2
Colour A yarn
Rnd 1: mr, sc 6 (6)
Rnd 2: [inc] x6 (12)
Rnd 3-4: sc 12 (12) (2 rounds)
Stuff the eye with the yarn tail.
Make 2 eyes.
Add safety eyes between rounds 3 and 4

To sew the eyes on the body, place the eyes on rounds 2 - 5 on top of the head. Ensure the eyes are facing forward.
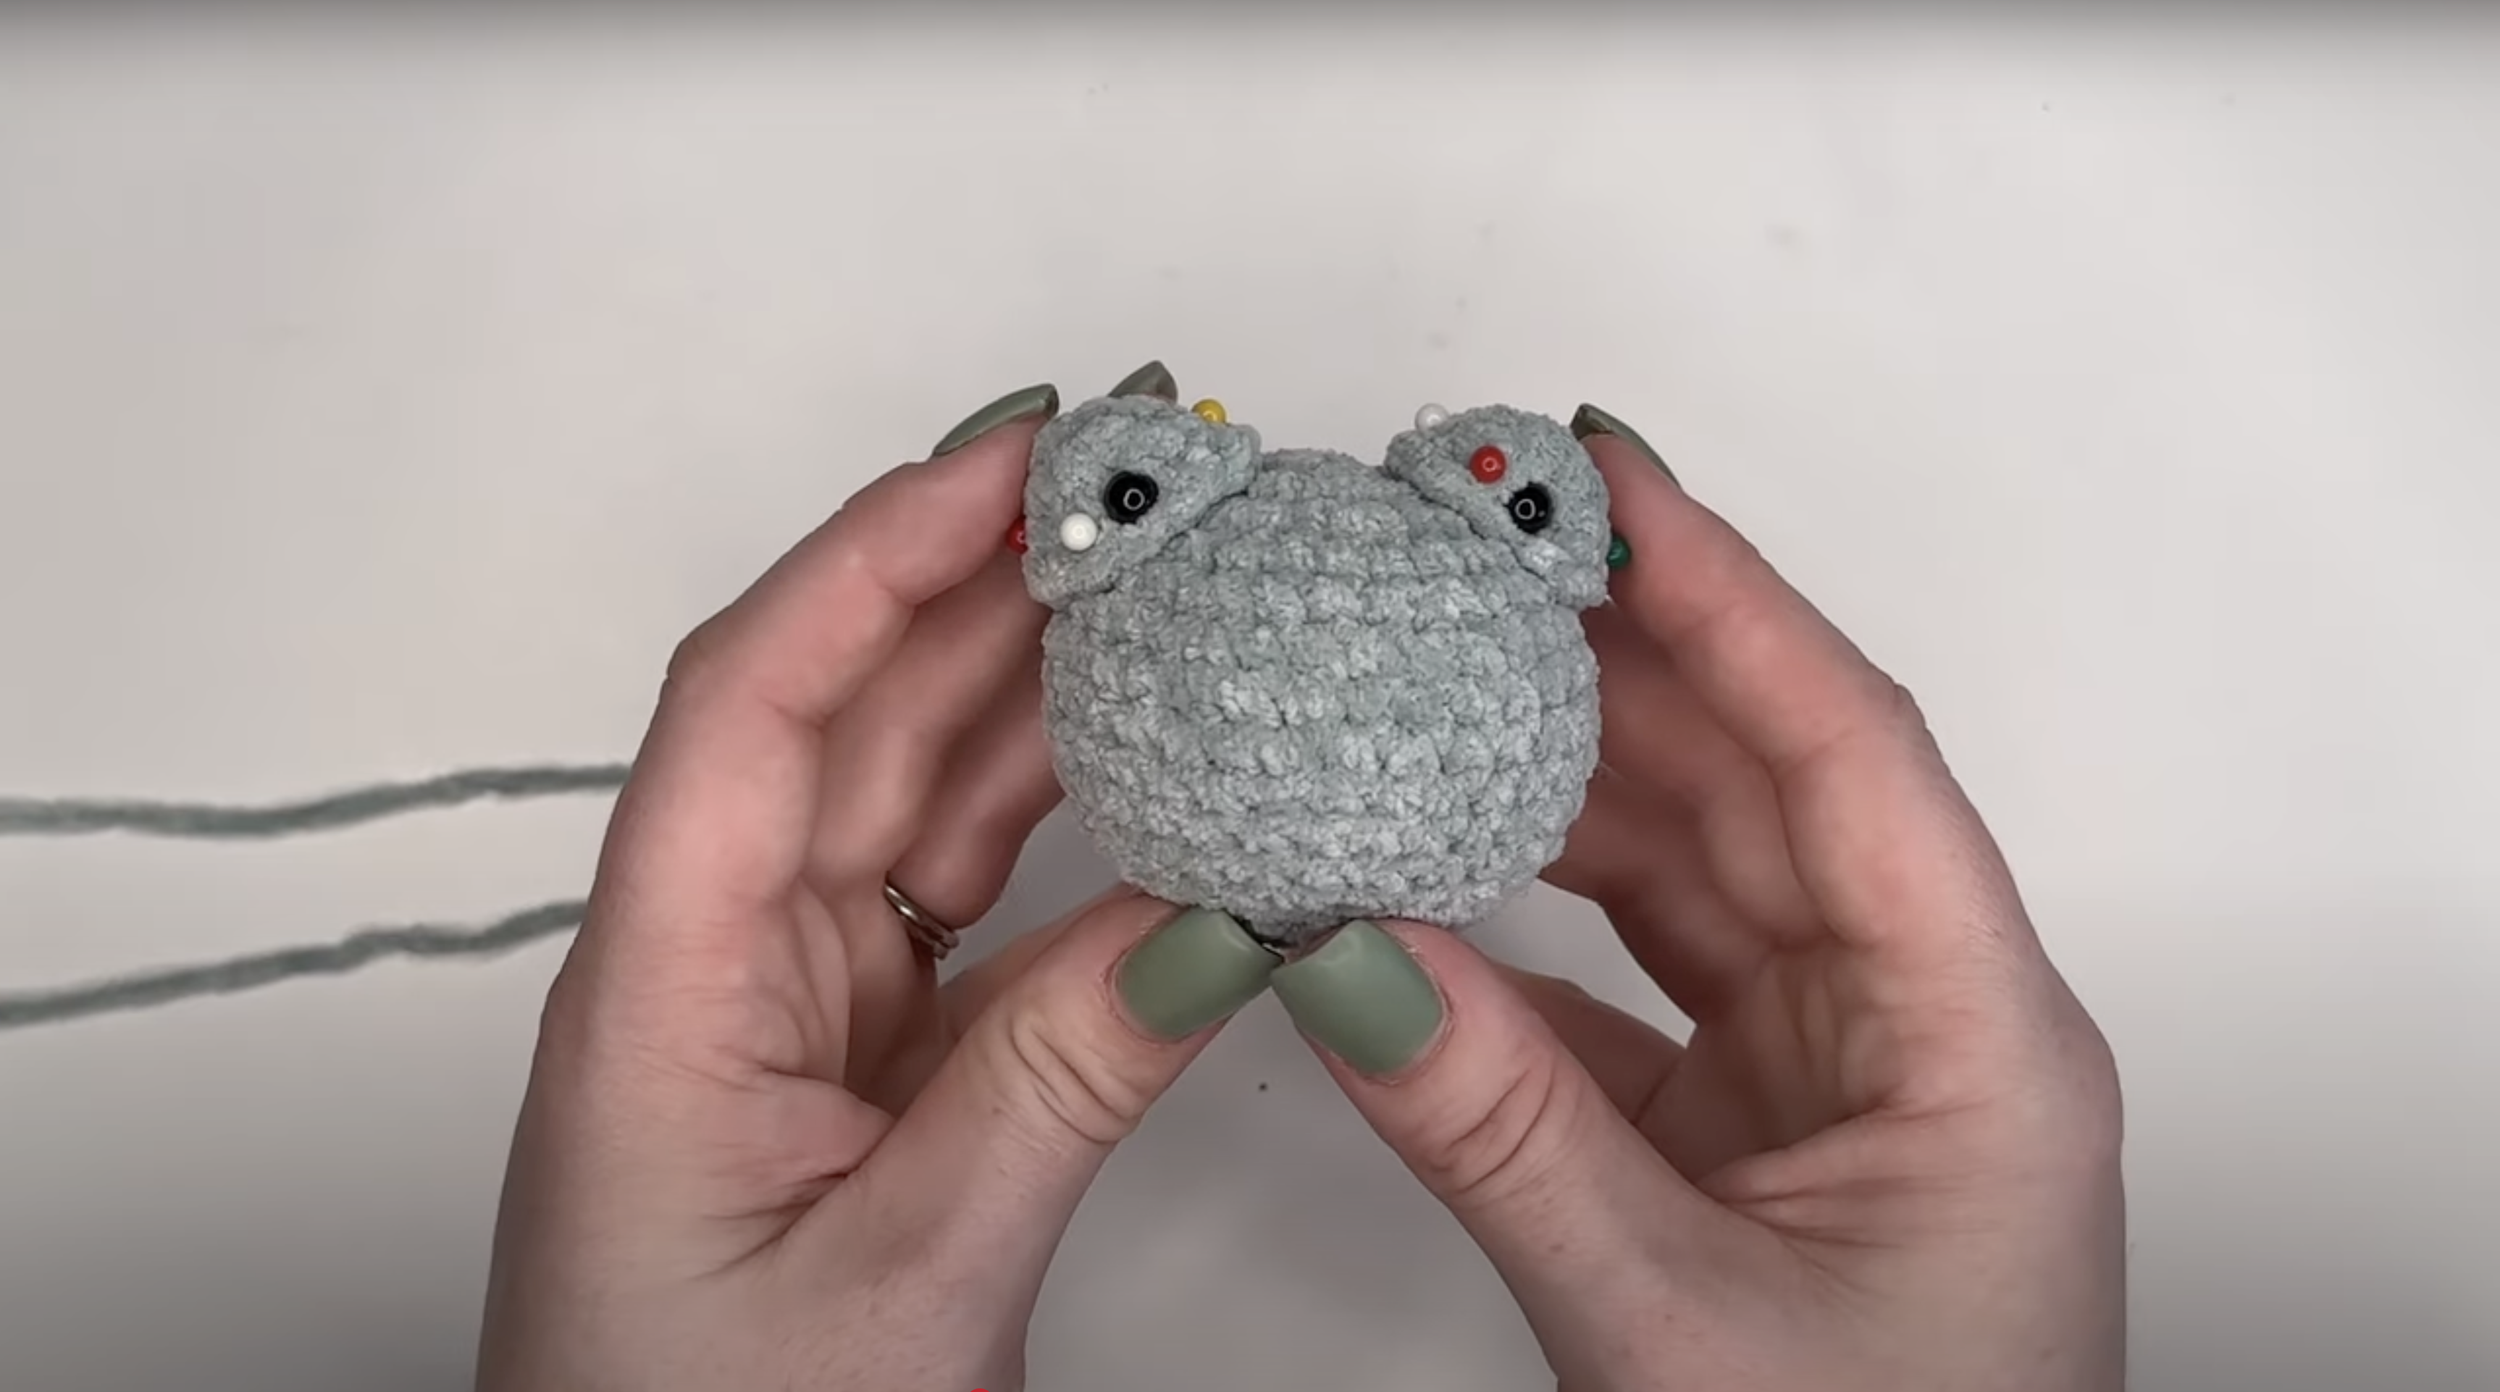
Sew 3/4 of the way and then add a little bit of stuffing.
Tie off, weave in ends.
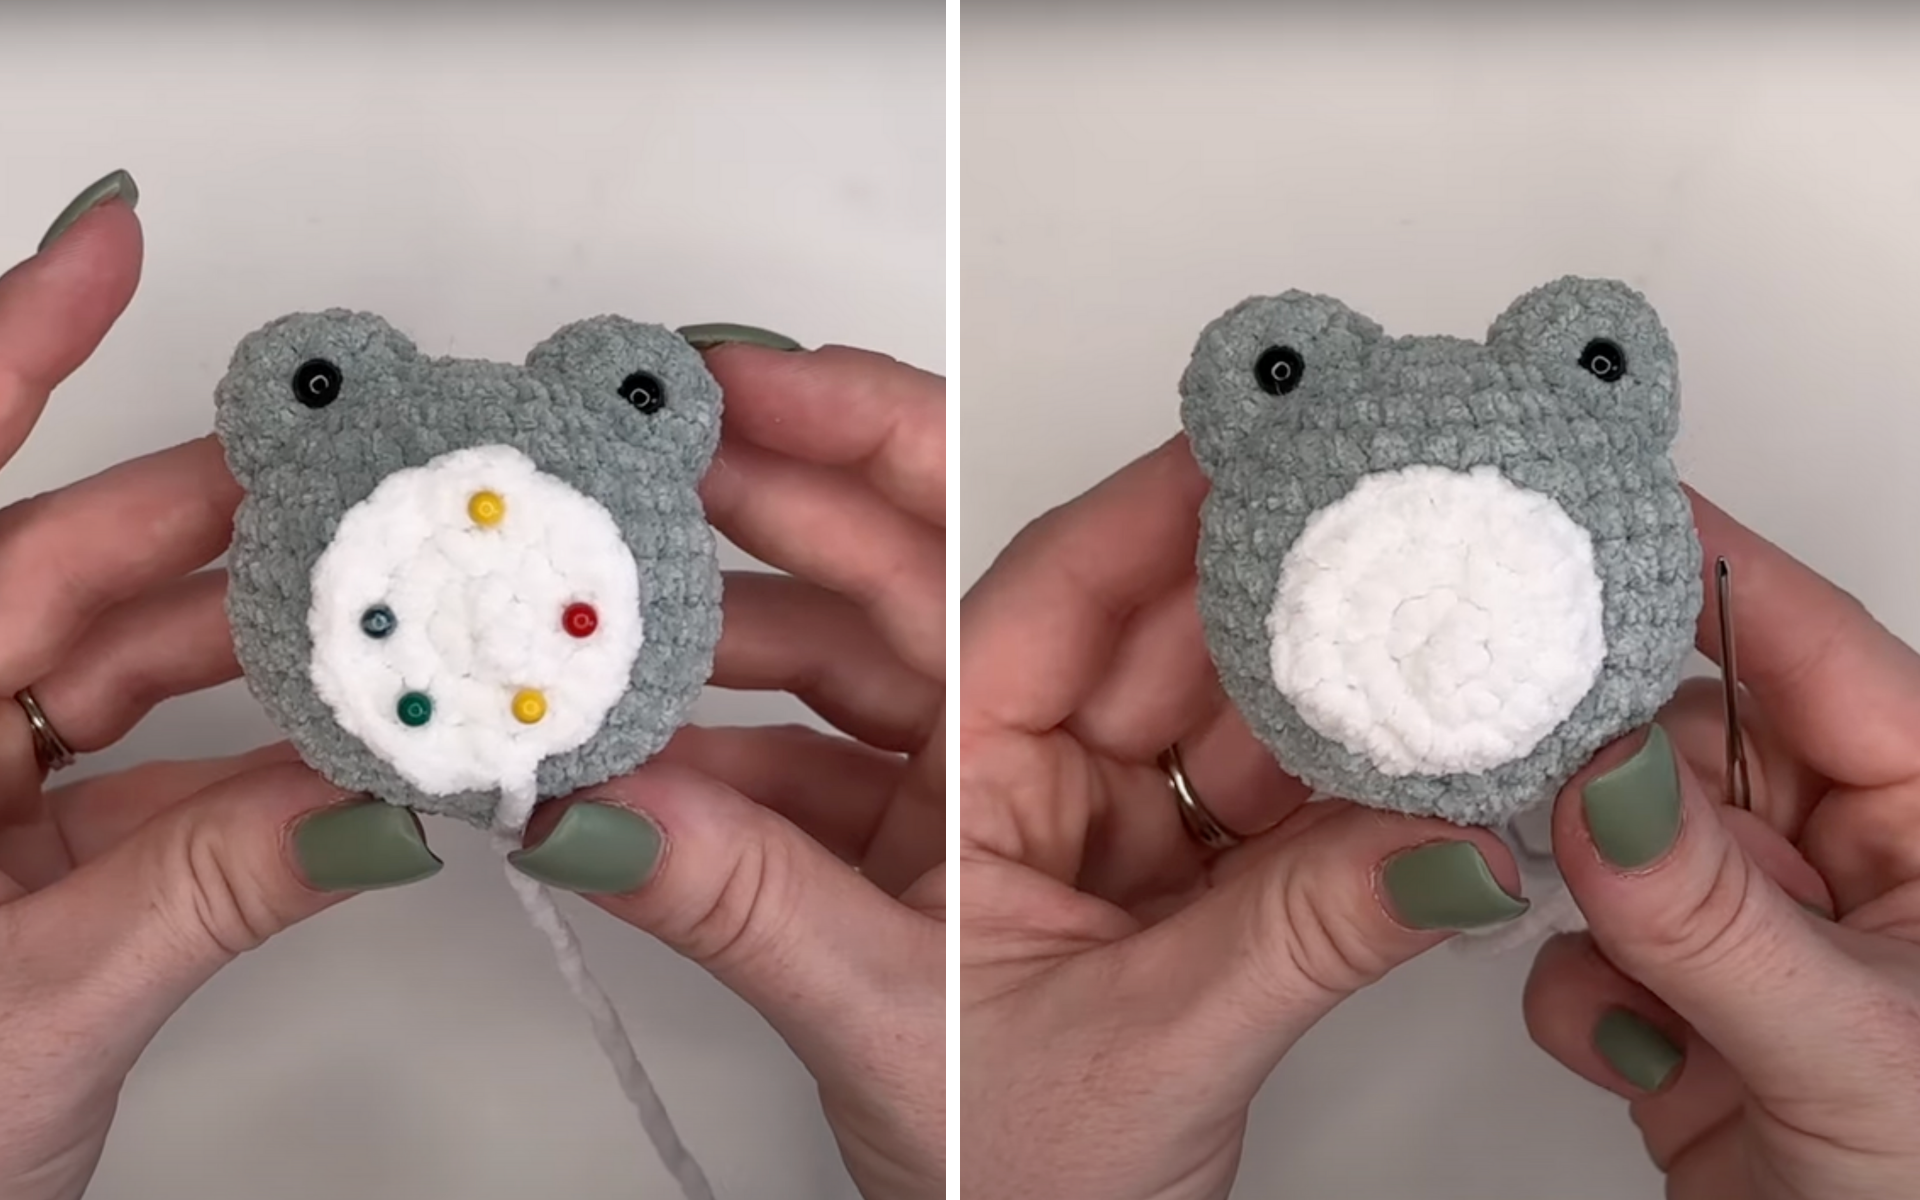
Belly plate
Colour B yarn
Rnd 1: mr, sc 6 (6)
Rnd 2: [inc] x6 (12)
Rnd 3: [sc, inc] x6 (18)
Attach belly plate to rounds 6-12, centered on the eyes.
Arms
Rnd 1: mr, sc 6 (6)
Rnd 2-4: sc 6 (6) (3 rounds)

Sew the arms on rounds 7-8 with one round between the arm and the eye. Place your arms in line with the eye on the side of the body. Push the arms forward a little bit, they will support the swing.
Tie off, weave in ends.
Smile
Colour D yarn
We’re going to make a little vee for the smile.
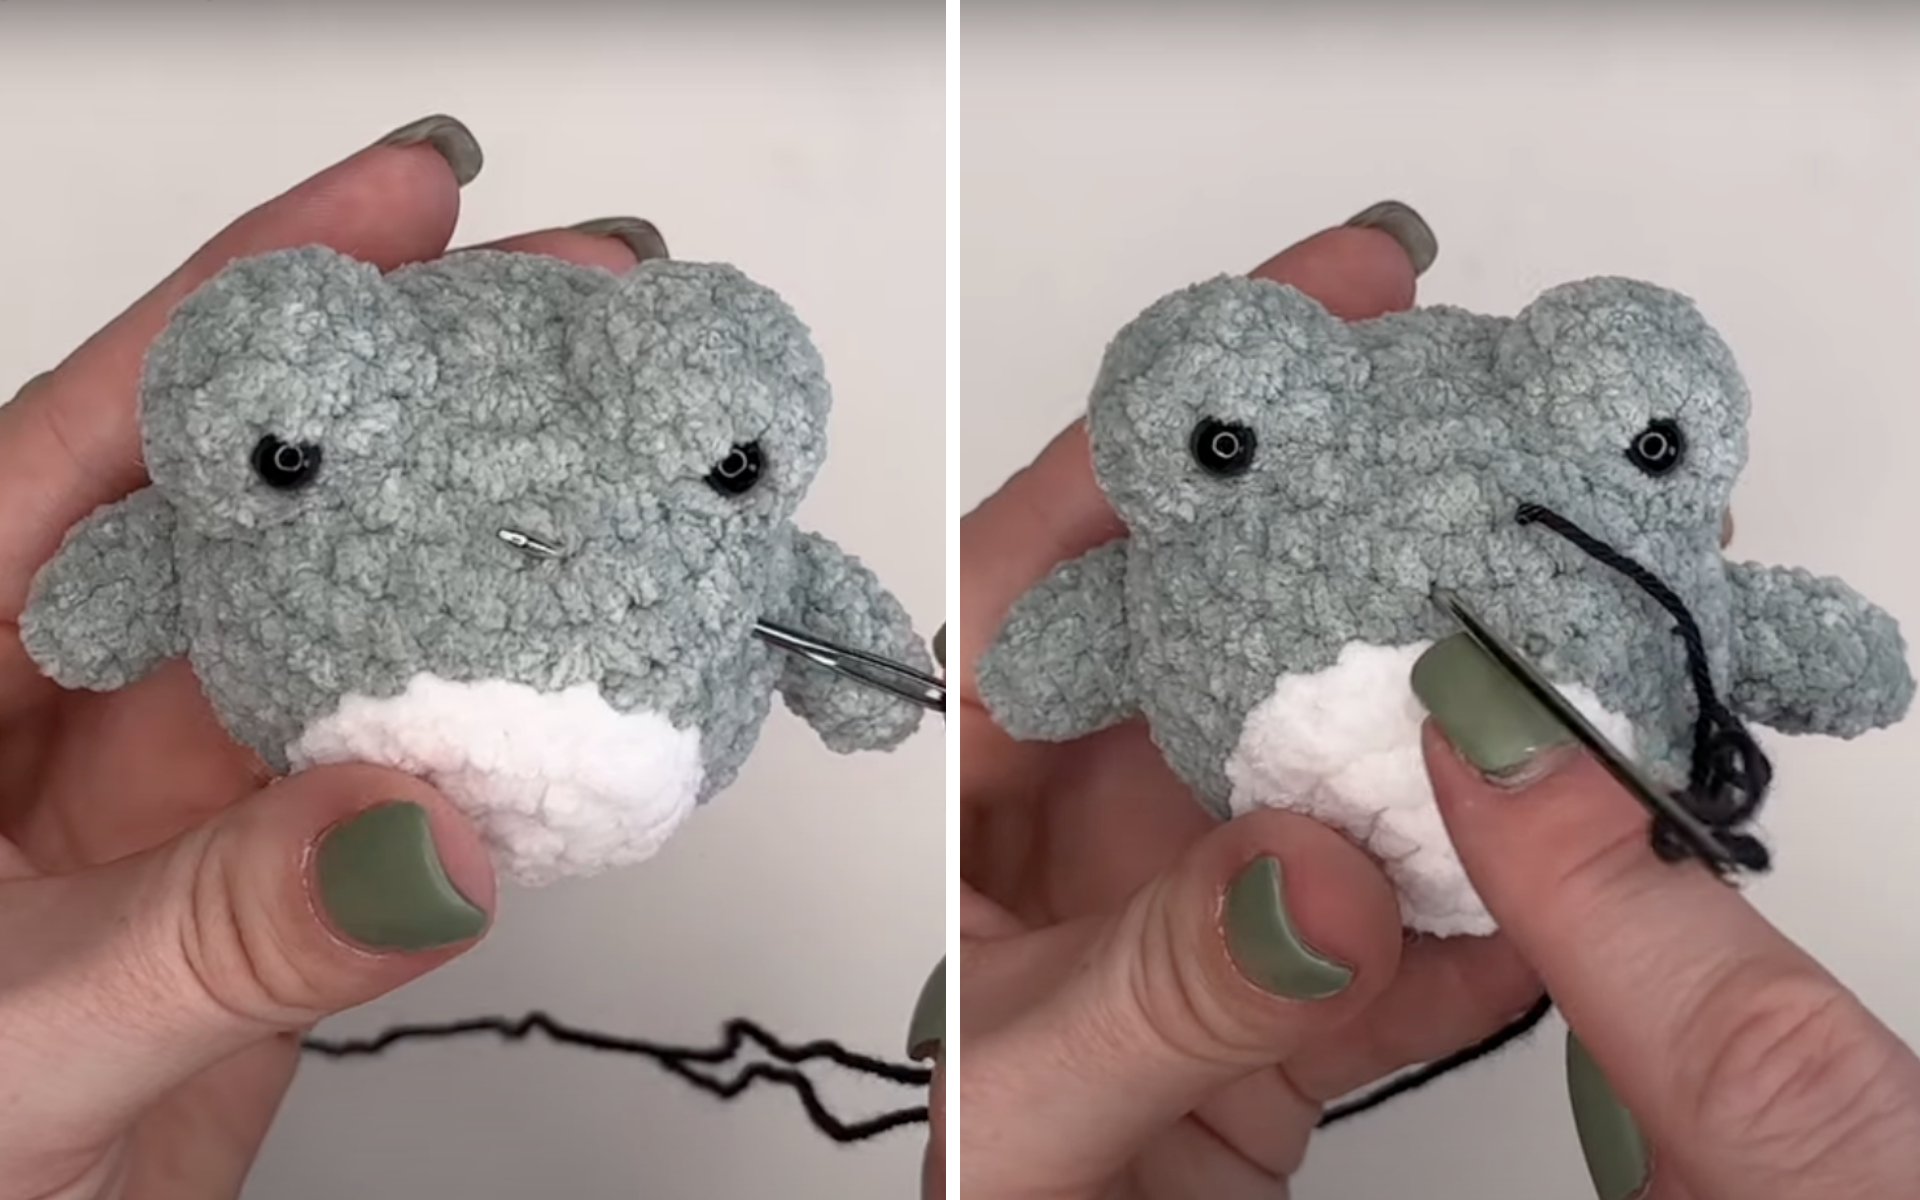
Step 1: Insert your needle 1.5 stitches from the eye
Step 2: Insert needle down one stitch from belly stitch and over 2 stitches.

Step 3: Push back up towards the other eye.
Step 4: Insert back into bottom of smile and push needle out to where you started.
Gently tie off (don’t pull too tight as you might pull the smile into the yarn) and weave in ends.
Legs
Colour A yarn
2 stitches from bottom of belly plate. Place markers to see where you want to place the legs.
Make a slipknot. Slst into body, chain 12. Then [ch 3, skip first ch, slst into next 2 chains] x3. Sc into remaining 12 chains. Slst back into body.

Slip stitches to make the toes.
Tie off, weave in ends.
Swing
Colour C Yarn
Row 1: slip knot, chain 16. Skip first chain, sc in remaining 15 ch, ch 1 and turn
Row 2- 7: sc 15, ch 1 and turn (6 rows)

On the side of the swing chain 10. Slst to opposite corner. Tie off.

Repeat on second side, chain 10. Slst to opposite corner. Tie off.
For the top of the swing, make a slip knot and attach to the center of the side loop.

Chain 50 (or to desired length). Ensure your chain isn’t twisted, and slst to the center of the opposite side loop.

Assemble the froggy into the swing, and you’re all done! You can sew the frog and the swing together, or add a dab of hot glue if you’re worried about them coming apart.
And that’s it!

You can get the full video tutorial below on our YouTube channel.
We hope you enjoyed this little free swinging frog crochet pattern. Stay up to date with everything Double Dutch by subscribing to our newsletter and check back here often!
We always love to see your creations so feel free tag us on Instagram @doubledutchcrochetco!
This work is copyrighted. Please do not alter this pattern in any way. You may not use any photos or written content in this pattern as your own. You may sell your work created using this pattern, but you must credit Double Dutch Crochet Co. as the original designer, including a link back to our original work. Copyright 2025.